20 Nov 2016
In this article we are going to use Particle Core (ex-Spark) board to build a simple IoT project. We will use a humidity and temperature sensor (DHT22), sent the data to the Particle cloud and then visualise the measurements in real time.
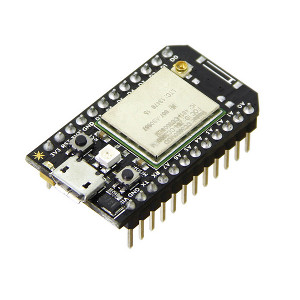
Particle core is a little board build around a Cortex M3 MCU and the WiFi CC33000 SoC from Texas Instruments. It connects automatically to the Particle cloud platform and it is instantly accesible from the web.
Hardware Configuration
For this project we are going to use the following components:
- Particle Spark Core Board (link)
- DHT22 temperature/humidity sensor (link)
- 10K resistor
- Breadboard
- Jumper Wires
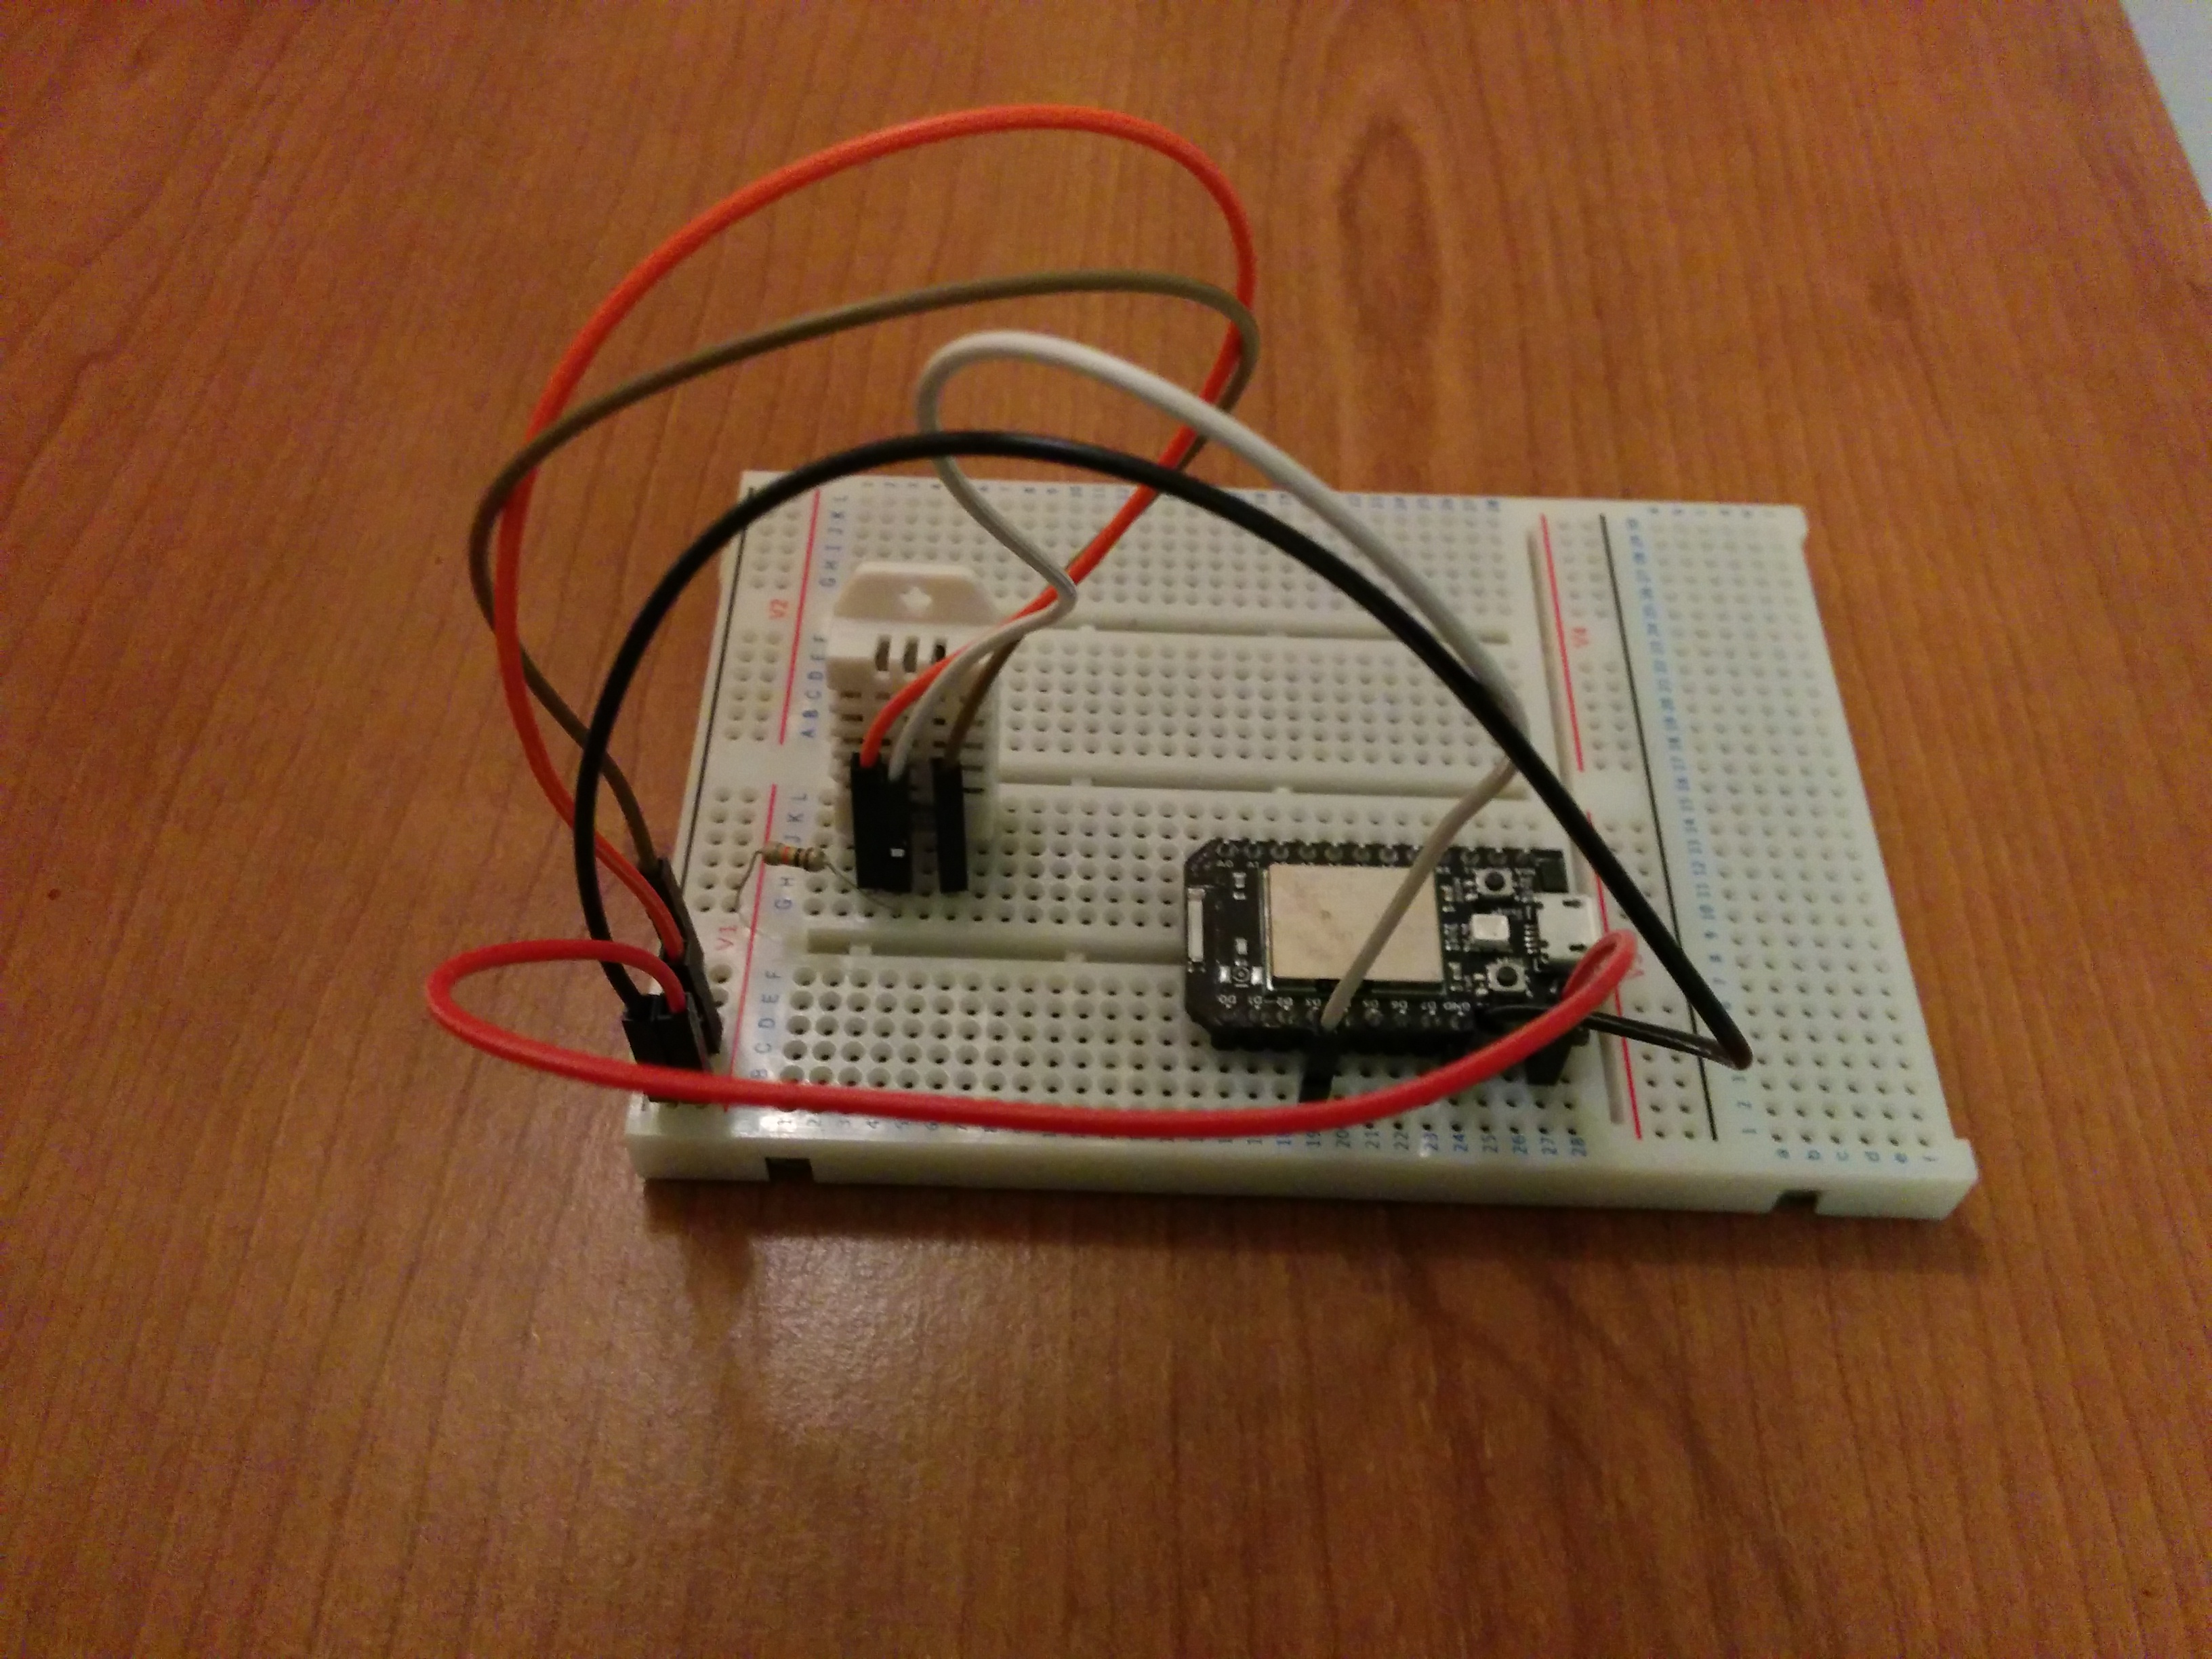
Below are a schematic with all the different components of this project:
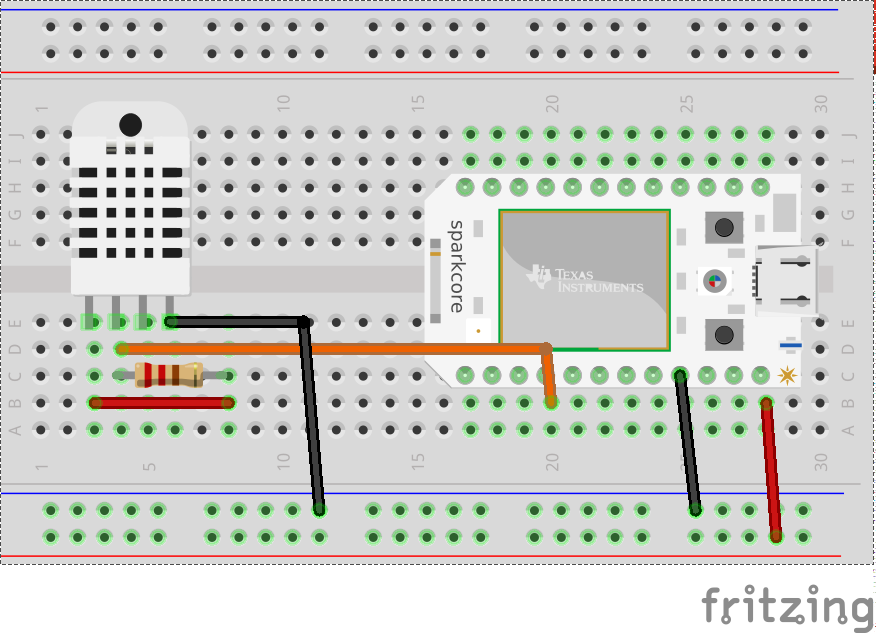
The DHT22 sensor has 4 pins. The left pin is the VCC and the right one the GND. Pin2 is the DataOut and Pin3 is not used. We connect Pin2 to the D3 pin of the Particle Core and we also place the 10K resistor between Pin1 and Pin2 of the sensor.
The code
Particle has a web IDE that can be used to write and flash code onto particle devices. Additionally particle offers a Command Line Interface (CLI) to interact with devices and the particle cloud from the terminal. Find more information about how to install an use the CLI here.
We are going to use Adafruit_DHT library for our project. If you are using the web IDE then you can easily find and add the library from “libraries” menu. If you are using the CLI instead then download “Adafruit_DHT.cpp” and “Adafruit_DHT.h” from this repository and save this files inside the same directory with the code below:
#include "Adafruit_DHT.h"

// DHT parameters
#define DHTPIN 3
#define DHTTYPE DHT22

// Variables
int temperature;
int humidity;

// Create an instance of DHT sensor
DHT dht(DHTPIN, DHTTYPE);

void setup() {

    // Initialize DHT sensor
    dht.begin();
}

void loop() {

    // Temperature measurement
    temperature = dht.getTempCelcius();

    // Humidity measurement
    humidity = dht.getHumidity();

    // Use publish() function to send the data every 2 seconds on the Particle cloud platform:
    Spark.publish("temperature", String(temperature) + " °C");
    delay(2000);
    Spark.publish("humidity", String(humidity) + "%");
    delay(2000);

}
Notes
Before flashing the code we need to know the device id:
shell
$ particle find
and then use the command below to compile and flash the source code:
$ particle flash 0123456789ABCDEFGHI dht22.ino Adafruit_DHT.cpp Adafruit_DHT.h
Change 0123456789ABCDEFGHI with your device id.
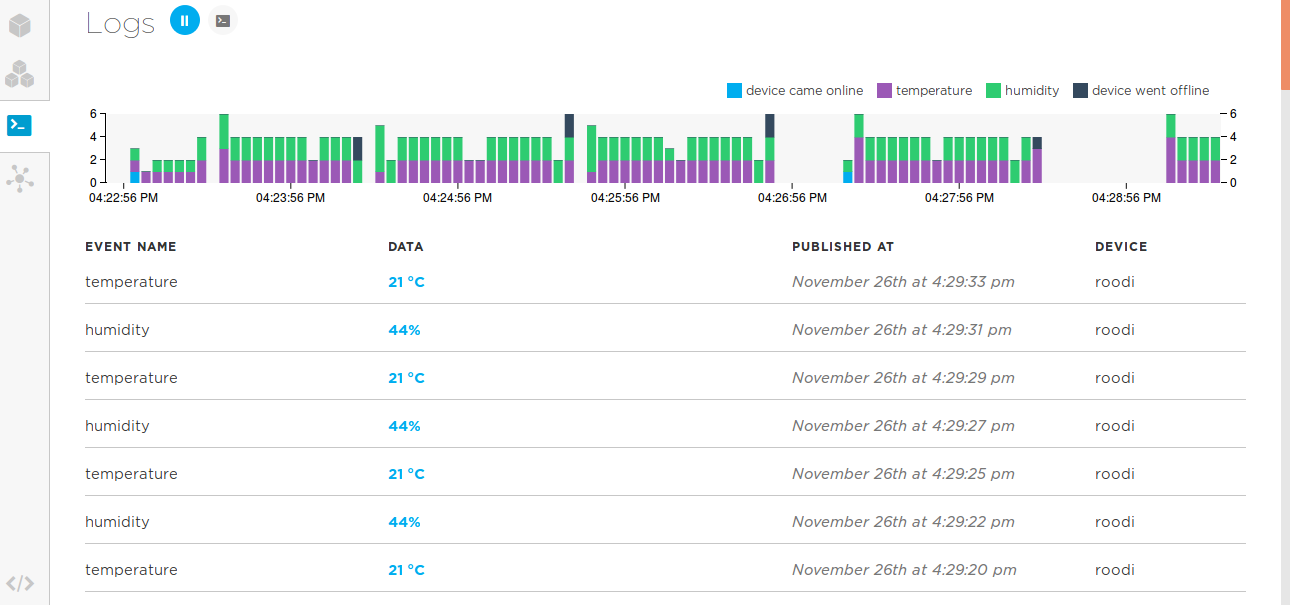
Visualizing the data
The publish() function we use in our code allow us to sent data directly to the Particle cloud platform. We can see a live visualization of this data by going there:
https://console.particle.io/logs
19 Nov 2016
This tutorial shows a way to read humidity and temperature from the environment with an Arduino and displays them on a LCD screen.
For this project we are going to use the following components:
- Arduino board
- 20x4 Character LCD (link)
- DHT22 temperature/humidity sensor (link)
- 10K resistor
- Breadboard
The DHT22 is a low-cost digital sensor. It uses a capacitive sensor and a thermistor to measure the surrounding air. It is well calibrated and can measure humidity (0-100% RH) with +-2% and temperature(-40°C-80°C) with +-0.5°C accuracy.

DHT22 sensor has 4 pins:
- Pin1: VCC
- Pin2: Data Out
- Pin3: Not Connected
- Pin4: GND
We use a 20x4 LCD screen to display the results. Below are the pinouts from the LCD and the corresponding pin connection on the Arduino:
| Pin number |
TextLCD pins |
arduino pins |
| 1 |
GND |
0V |
| 2 |
VCC |
5V |
| 3 |
VO |
0V |
| 4 |
RS |
pin12 |
| 5 |
RW |
0V |
| 6 |
E |
pin11 |
| 7 |
D0 |
not connected |
| 8 |
D1 |
not connected |
| 9 |
D2 |
not connected |
| 10 |
D3 |
not connected |
| 11 |
D4 |
pin7 |
| 12 |
D5 |
pin6 |
| 13 |
D6 |
pin5 |
| 14 |
D7 |
pin4 |
| 15 |
LED+ |
5V |
| 16 |
LED- |
0V |
Notes:
- Pin 3 gives contrast to the LCD screen and it is normally connected to a potentiometer. If you don’t need to adjust the contrast then you can just connect this pin to ground.
- Pin 5 is the read/write pin and can be in 2 modes. If it is in the write mode(LOW) then we can write(display) text to the LCD. When it is in the read mode(HIGH) we can read what the LCD is displaying. Since the latter is a rare situation, to make things simple we will have this pin permanently connected to the Ground pin of the arduino.
Check below the final circuit:
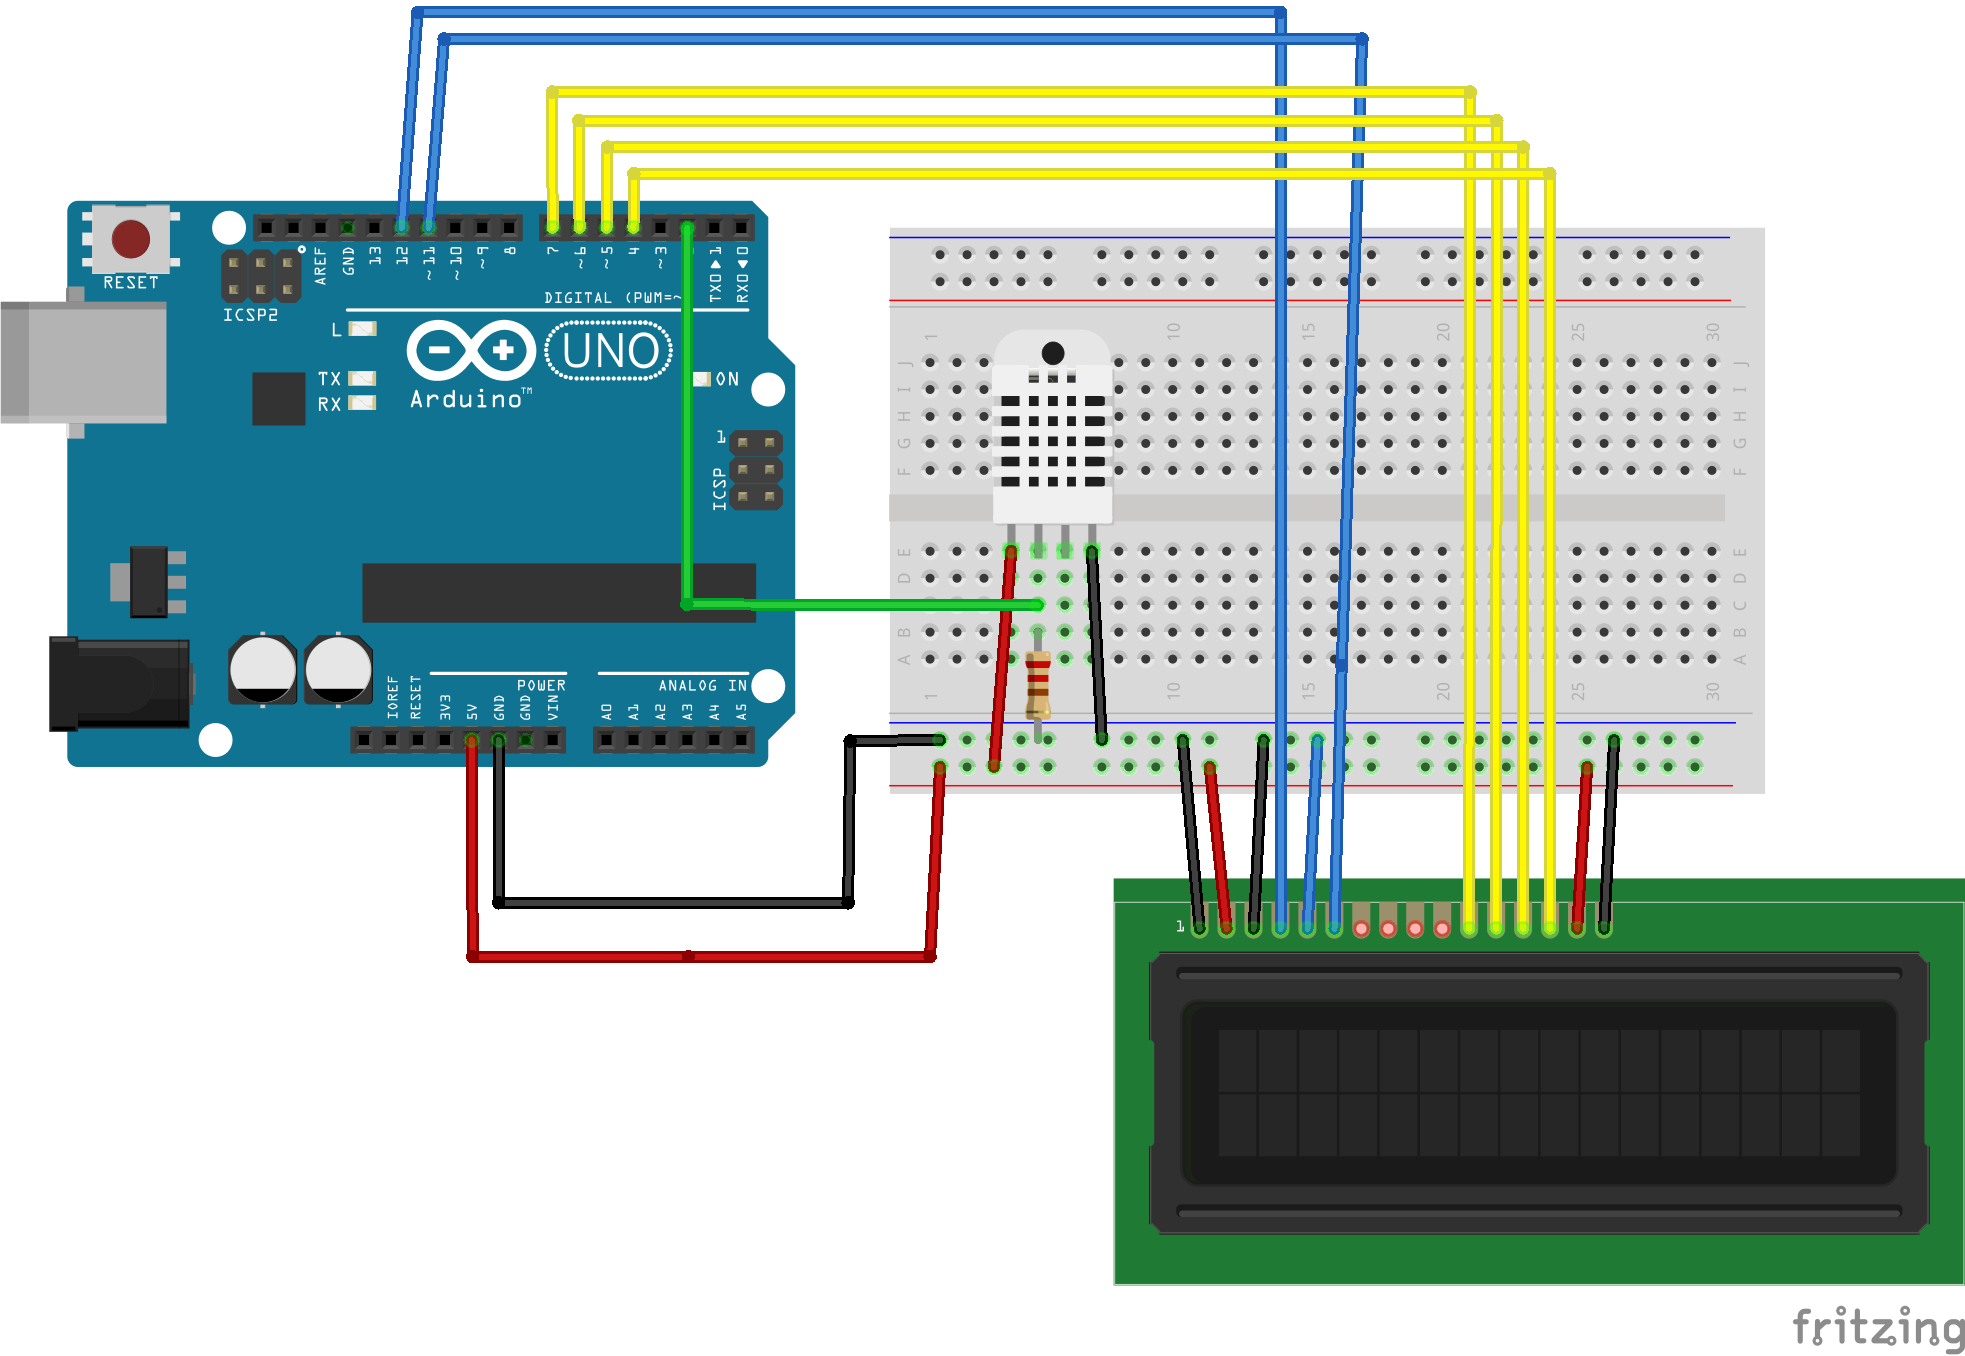
Notes:
- Place a 10K resistor between VCC and the data pin to act as a pull-up resistor.
Code:
To use the DHT22 sensor you need to download and install the suitable library from adafruit’s github page. Download (or clone) the repository, rename the uncompressed folder to “DHT” and save it into the arduino “libraries” folder. For a more detailed tutorial on how to install arduino libraries check here. Addittionaly you need to install the Adafruit_Sensor library.
// include the library code:
#include <LiquidCrystal.h>
#include <DHT.h>

#define DHTPIN 2 //the digital pin where DHT22 sensor is connected
#define DHTTYPE DHT22

// initialize the library with the numbers of the interface pins
LiquidCrystal lcd(12, 11, 7, 6, 5, 4);
DHT dht(DHTPIN,DHTTYPE);

void setup() {
  // set up the LCD's number of columns and rows:
  lcd.begin(20, 4);
  // Print a message to the LCD.
  lcd.print("DHT22 test");
  dht.begin();
}

void loop() {
  delay(2000); //Wait a few seconds between measurements
  float h = dht.readHumidity();
  float t = dht.readTemperature();

  if (isnan(h) || isnan(t)){
  lcd.print("Failed to read from DHT sensor");
  return;
  }
  //Compute the heat index in Celsius
  float hic = dht.computeHeatIndex(t, h, false);

  lcd.clear();
  lcd.print("Humidity: ");
  lcd.print(h);
  lcd.print ("%");
  lcd.setCursor(0,1);
  lcd.print("Temp: ");
  lcd.print (t);
  lcd.print("*C ");
  lcd.setCursor(0,2);
  lcd.print("Heat Index: ");
  lcd.print(hic);
  lcd.print("*C");
}
Notes
- The “heat index” is what the temperature feels like to the human body when relative humidity is combined with the air temperature. More information here.
Check Temperature and Humidity with DHT22 and Arduino from Ioannis on Vimeo.
